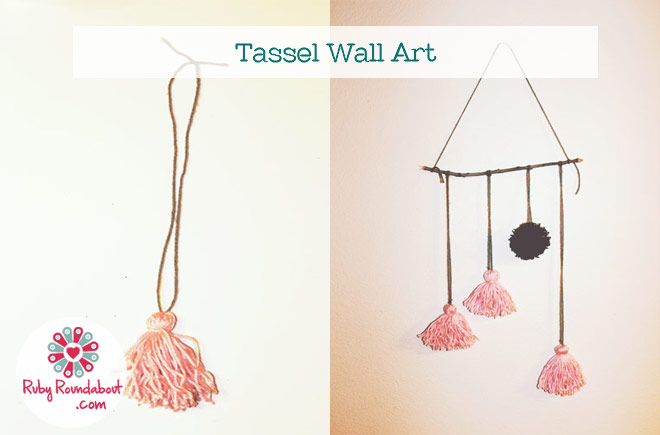
Tassel Wall Art
There are few things as satisfying as hanging something you made up on the wall, not just for a little while, but for a long while. When you make this tassel wall art, if you take the time to do it right, it is the type of craft meant to stay on display for a while. Depending on the colours you choose, this decorative craft could add just the right touch you are looking to add to your room. Just follow these easy steps and see for yourself.

Supplies
- Yarn (different colours are best)
- A Stick
- Scissors

Step 1. First thing is first, make your tassels. This can easily be done by winding your yarn a number of times around a small, flat rectangle. It can be a piece of cardboard, a small book, or in this case, a notepad. To make even a skinny tassel you will want to wrap it around your notepad a lot. If you want a fat, fluffy tassel you will need to wrap it a lot more. Just use your eye to judge when you think you are done.
Step 2. At that point snip off a length of yarn to thread between your wrapped yarn and the note pad. Pull it to the top and then tie it tight. When this is done cut the other end so your tassel comes free of the notepad.
Step 3. Now you want to finish your tassel by tying another string a little bit below your other tie, but this time around the whole thing. Again, pull it and tie it tight. When this is completed you can trim the ends of your tassel so they look nice and neat. Repeat these first three steps making however many tassels you want for your tassel wall art.
Step 4. To add a little variety, this tassel wall art also has a pom pom in a different colour. To make this pom pom all you need to do is use your fingers. Place a length of thread between your middle and ring finger; you will use this to tie the pom pom all together so make sure it is long enough. Then wrap the yarn around your four fingers a number of times. Don’t do it too tight. Once your yarn is wrapped a good number of times use the first length of thread to slip the loops off your fingers while also tying it in the middle. Then cut all the loops on both sides and trim the edges so it forms a nice, round pom pom.
Step 5. Now it is time to add some string to your tassels and pom poms so you can hang them for your wall art. The easiest way to do this is by threading a length of yarn through that top loop. If you have a crochet hook, that will work great; if not, a toothpick or something similar will suffice. Just slip your hook under that single strand, grab your other string, and pull it through. Then tie a knot with the ends and trim it so it looks like a necklace. To complete this step, slide the knot back down to the top of the tassel. Do this with all of your tassels and pom poms, cutting some strings longer and some shorter.
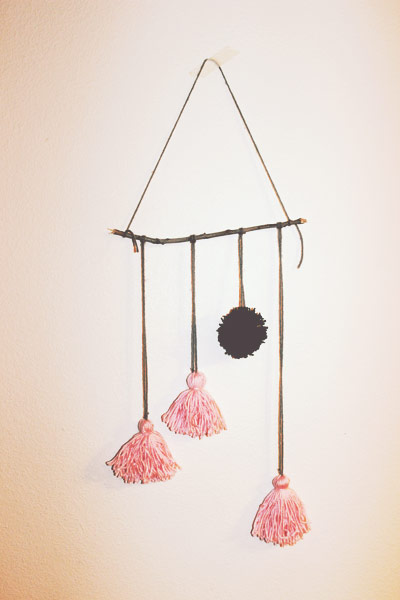
Step 6. To finish all you have to do is loop the string around the stick, pull the tassel through the loop, and then pull the string tight making a little knot. Once you have added all the tassels and pom poms where you want them you can tie a handle to the outside edges of your stick and your new tassel wall art is finished and ready to hang.
Personalise the Craft
You can make this tasselled wall art any number of ways and in any number of colours. If you want to thread more than one tassel on a single length of yarn, you can do that. If you want to hang more pom poms than tassels, you can do that. If you want to use camo colours or paint your stick, you can do those things too. Make this tassel wall art however you want to and then you will enjoy it all the more when it is on display.
Recommended
-
Glue Salt and Food Colouring ArtMay 13th, 2014
-

Wood Bead KeychainMay 6th, 2014
-

Junk Mail EnvelopesApril 29th, 2014
-

Envelope BookApril 1st, 2014
-
Painted Pickup SticksMarch 24th, 2014
