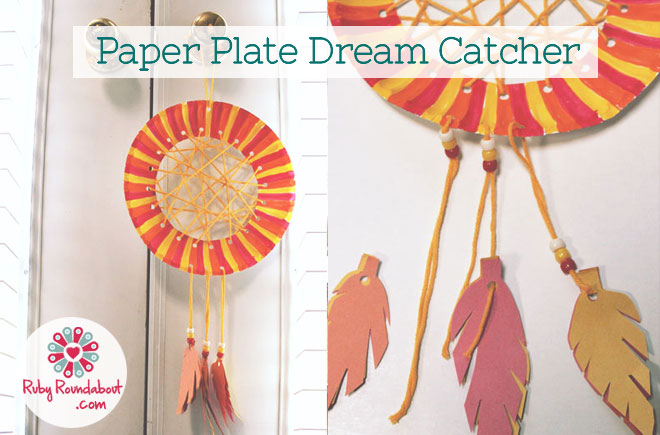
Paper Plate Dream Catcher
There is something so fun about a dream catcher, but making a real one by hand with wax string, feathers, and a metal hoop can be tricky. Fortunately you can make an easy, beautiful paper plate dream catcher from things you already have around the house. Just choose some of your favorite colors, grab a paper plate, and chase all the nightmares away.
Supplies
- Paper plate
- String
- Beads
- Construction paper
- Markers
- Scissors
- Hole punch

Step 1. The first thing you have to do for your paper plate dream catcher is to cut the middle out of your paper plate. This can be a little tricky so be patient and be careful while you cut. Find a bowl or a lid and trace a large circle in the middle of your plate. Next use the scissors to poke a hole in the middle of the plate and just cut in a spiral shape until you can cut along the outline you traced.
Step 2. Now use your makers and draw patterns along the edge of your plate. You can do stripes, or zig zags, or flowers, etc. Use your favorite colors and be careful not to get your markers on things you shouldn’t.
Step 3. Next use your hole punch to make holes around the inside edge of your paper plate. If you want them evenly spaced you can use the ridges along the edge of a paper plate as a guide.
Step 4. All you have to do for this next step is string yarn through the holes of your plate. The pattern can be completely random, but just make sure you use each hole at least one time. That way the inside of your paper plate dream catcher will look nice and full.
Step 5. Next, if you want to decorate your dream catcher with feathers, you use your construction paper and scissors to make some. For this dream catcher there are three of each kind, making for a total of nine feathers. Just stack the colored paper and cut them out at the same time. Then use the hole punch on the end of each feather so you have a place to string the yarn through.
Step 6. Now punch three holes in a row on the bottom of your dream catcher. This is where you will string your feathers. Pull the string halfway through the holes and then slide some beads up to the top of both pieces of string. Now, at the bottom of the string, tie on your feathers and slide the beads back down.
Step 7. The last step is to punch one hole in the top of your paper plate dream catcher and thread it with more string. Tie off the ends of the string and your are done! You have a beautiful hanging dream catcher to help ward off the nightmares.
Personalize the Craft
One of the best parts of the paper plate dream catcher is that you can use any colors you want. If you have the markers, the beads, and the paper then you can make it pink, or blue, or rainbow colors. You can also use stickers or paints on your dream catcher if you have them. When finished, this is a great craft to display in your room, especially over your bed or on your door knob. It will not only be a cool accessory, but can help chase away all those bad dreams.
Recommended
-
Glue Salt and Food Colouring ArtMay 13th, 2014
-

Wood Bead KeychainMay 6th, 2014
-

Junk Mail EnvelopesApril 29th, 2014
-
Envelope BookApril 1st, 2014
-
Painted Pickup SticksMarch 24th, 2014
