
Clay Pegs
I made these little clay pegs specifically to go on Christmas treat bags. I wanted to use them to seal my homemade soaps and other special treats I like to make for friends and family. They are ridiculously simple to make and they look absolutely gorgeous. I guarantee everybody will comment on their beautiful simplicity. This is one of those gorgeous simple crafts that the smallest of children can make. It’s just perfect!
What You Will Need:
- Air Drying Clay
- Small Cookie Cutters
- Wooden Pegs
- PVA Glue
Method:
Step 1: Roll out some air drying clay to about a 3mm thickness.
Step 2: Use a cookie cutter to press out some shapes.
Step 3: Let the shapes air dry on a drying rack for 24 – 48 hours. IDEA: You could stamp or write numbers on the shapes to make a cute advent calendar or write the name or initial of a gift recipient to use the peg as a gift tag. Patterned rubber stamps would also be a wonderful idea to add texture to your clay shapes.
Step 4: It’s optional at this point to glaze your clay shapes. You may prefer them painted & glazed.
Step 5: Attach shapes to each peg using a small dollop of PVA glue. Remove any excess.

A variation on this craft is to use wooden shapes to glue onto the pegs rather than the clay. You can buy packets of wooden shapes at your local craft supply store.
This is just one of our simple, low cost Christmas gift ideas. Click below to download our Christmas Craft e-Book which contains this craft and a lot more.
I hope you enjoy them. Let me know how it goes for you.
Trish xx
Download our Christmas Craft e-Book
Recommended
-
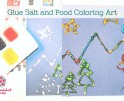
Glue Salt and Food Colouring ArtMay 13th, 2014
-

Wood Bead KeychainMay 6th, 2014
-

Junk Mail EnvelopesApril 29th, 2014
-

Envelope BookApril 1st, 2014
-
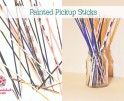
Painted Pickup SticksMarch 24th, 2014
