Pompom Bouquet
All it takes is a few supplies and a few minutes to make a fun, colourful pompom bouquet. It is a quick, simple craft that can be easily mastered and used over and over to produce beautiful flower bouquets for any and every occasion. Once you learn to make a pompom bouquet you may never go back to using natural flowers again, because these exciting displays are ones that will last much longer.

Supplies
- Colourful yarn
- Scissors
- Dinner fork
- Twigs
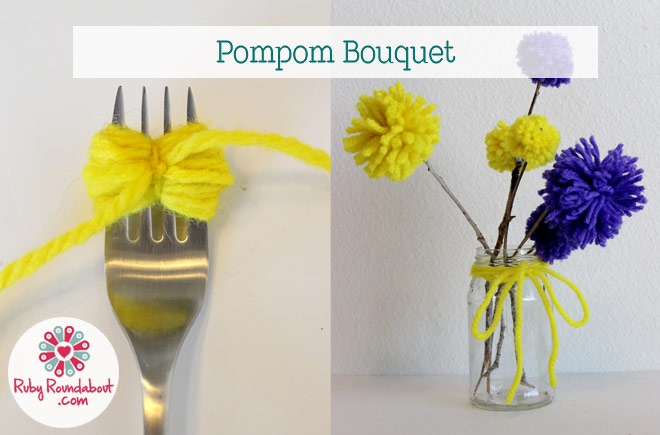
Step 1. To make a pompom you start by stringing one fairly short piece of yarn through the middle of your fork. It only has to be long enough to tie around your pompom. Then, you just wrap, and wrap, and wrap yarn around the fork until you can’t really fit any more (about 30-50 times around). Then, once you are done wrapping, cut your yarn from the skein.
Step 2. Now you use your little piece of string to tie the pompom together. All you have to do is wrap it around the top of the wrapped part, through the top tines of your fork, and tie it in the middle of your pompom with a super tight double knot. If you don’t tie it tight, then your pompom might fall apart. Now your pompom is really tight on the fork.
Step 3. For this step you cut the pompom off of the fork. The easiest way is to use small scissors and slide one edge of the scissors up between the yarn and the fork on one side, slip the pompom off of the fork and onto the scissors, and then cut. Then you will have to do the other side by hand, but it won’t take as long as doing the whole thing by hand. Just make sure you cut all of the loops on both sides.
Step 4. Now you trim your pompom. The best way to do this is to turn your pompom in all directions and snip off any long pieces with the scissors. When you are finished trimming it should look like a nice, round, pompom ball.
Step 5. The last thing you do is to gather up some small, short sticks from the yard and put your pompom flowers on the end to form the bouquet. Once you have assembled your pomom bouquet you can put them in a nice jar or vase to display. Don’t add water though, because these flowers will do just fine without it.
Personalise this Craft
To personalise this craft you can mix any coloured yarn you like. You can also make different sizes of pompom by using different forks, toilet paper rolls, or even your fingers. Another thing you can do is try wrapping two or three colours of yarn for the same pompom. It is really fun to see all the different types of pompoms you can make for new and interesting pompom bouquets.
Recommended
-
Glue Salt and Food Colouring ArtMay 13th, 2014
-

Wood Bead KeychainMay 6th, 2014
-

Junk Mail EnvelopesApril 29th, 2014
-

Envelope BookApril 1st, 2014
-

Painted Pickup SticksMarch 24th, 2014
